How to Upload a CSV in Pardot

Step 1: Navigating to Account Engagement Email Tab
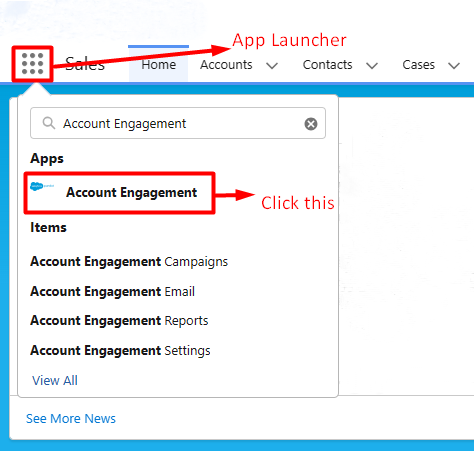
- Log into Salesforce: This is your login to the Salesforce platform, where Pardot is integrated.
- Click the App Launcher: Think of this as the starting point for various tools.
- Search for “Account Engagement”: Use the search bar to find “Account Engagement.”
- Click “Account Engagement” under Apps: This is where you’ll find the necessary tools.
Step 2: Creating and Exporting the Contact Report
- Click “Reports”: It’s like opening a folder to access reports.
- Check for Existing Pardot Import Report: Ensure there isn’t an existing report for Pardot import.
- Create a New Report: If needed, create a new report with the “Contacts and Account” report type.
- Make sure the report includes two fields: Contact ID and Email.
- Save and Run the Report: This generates the report data.
- Enter Report Details: Give your report a name and save it in the right folder.
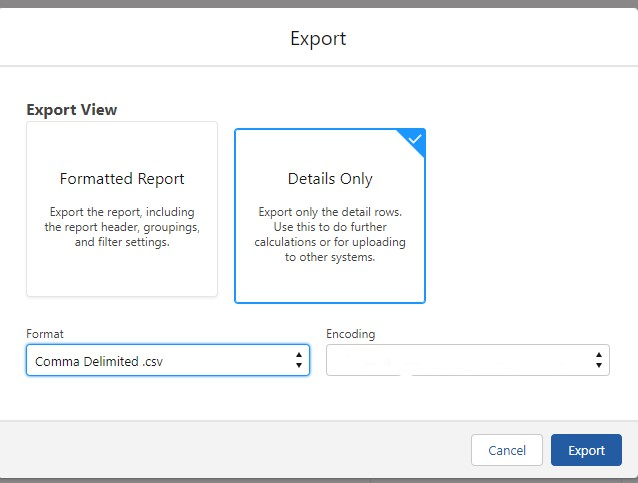
- Export Report: Click the down arrow next to the “Edit” button and select “Export.”

- Select “Details Only”: This is the data you want to export.
- Choose “Comma Delimited .csv”: This format is suitable for your data.
- Click Export: Get your report data in CSV format.
Step 3: Uploading a CSV in Pardot
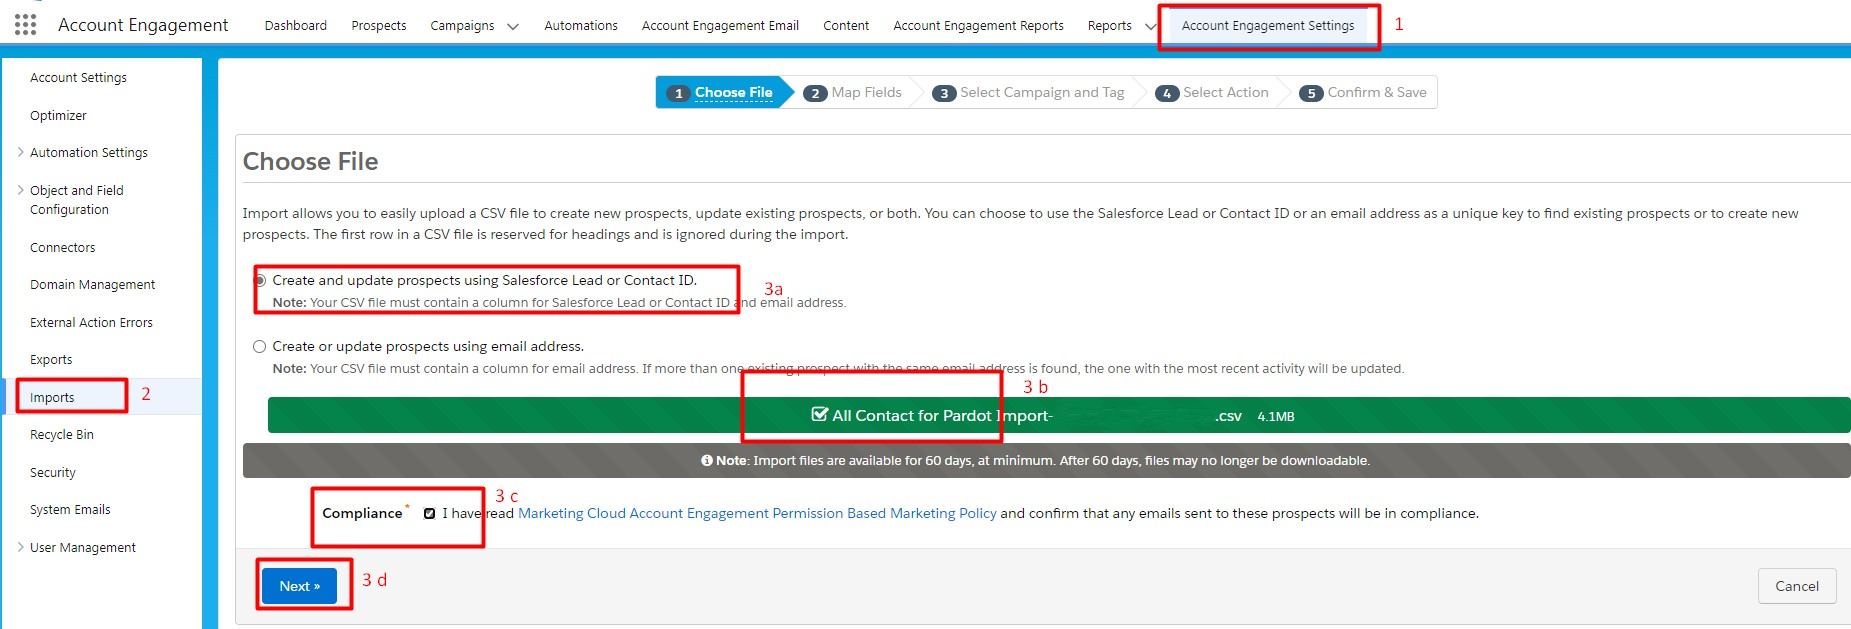
- Access Account Engagement Settings: Click on the “Account Engagement Settings” tab in the navigation bar. (1 In Image)
- Click “Imports”: This is where you manage data imports. (2 In Image)
- Choose File to Upload: Select “Create and update prospects using Salesforce Lead or Contact ID” radio button. (3 a) In Image)
- You can drag and drop the CSV file or upload it from your computer.
(3 b) In Image)
- You can drag and drop the CSV file or upload it from your computer.
- Check Compliance Checkbox: Ensure your data complies with regulations.
(3 c) In Image) - Click Next: Move to the next step. (3 d) In Image)
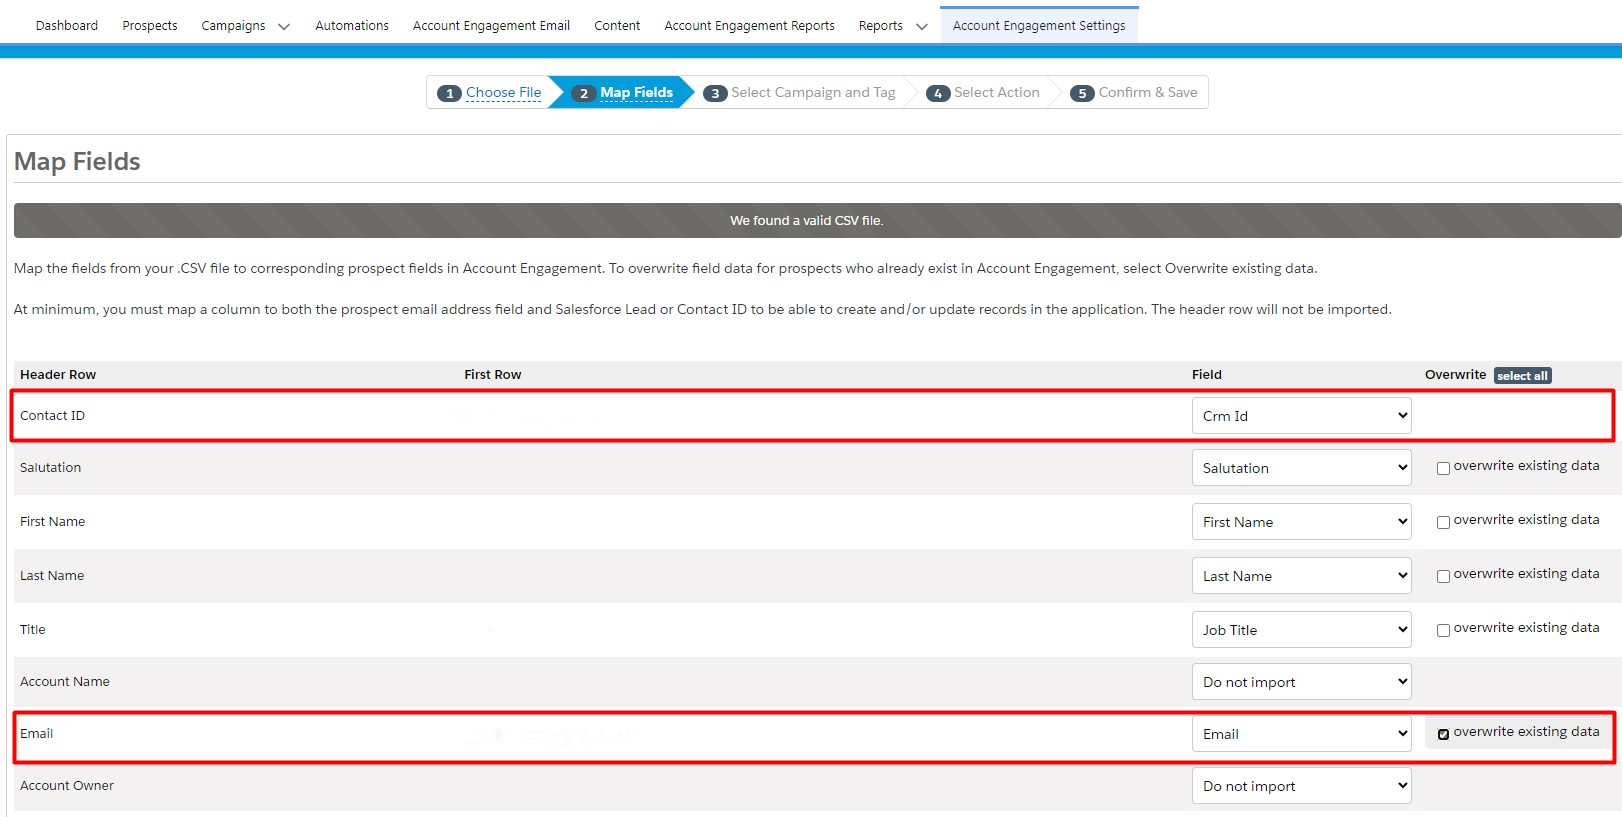
- Map Contact ID and Email: Confirm that the contact ID and email fields are correctly mapped.
- Select Overwrite Option: If needed, choose to overwrite data for specific fields like Email or First Name.
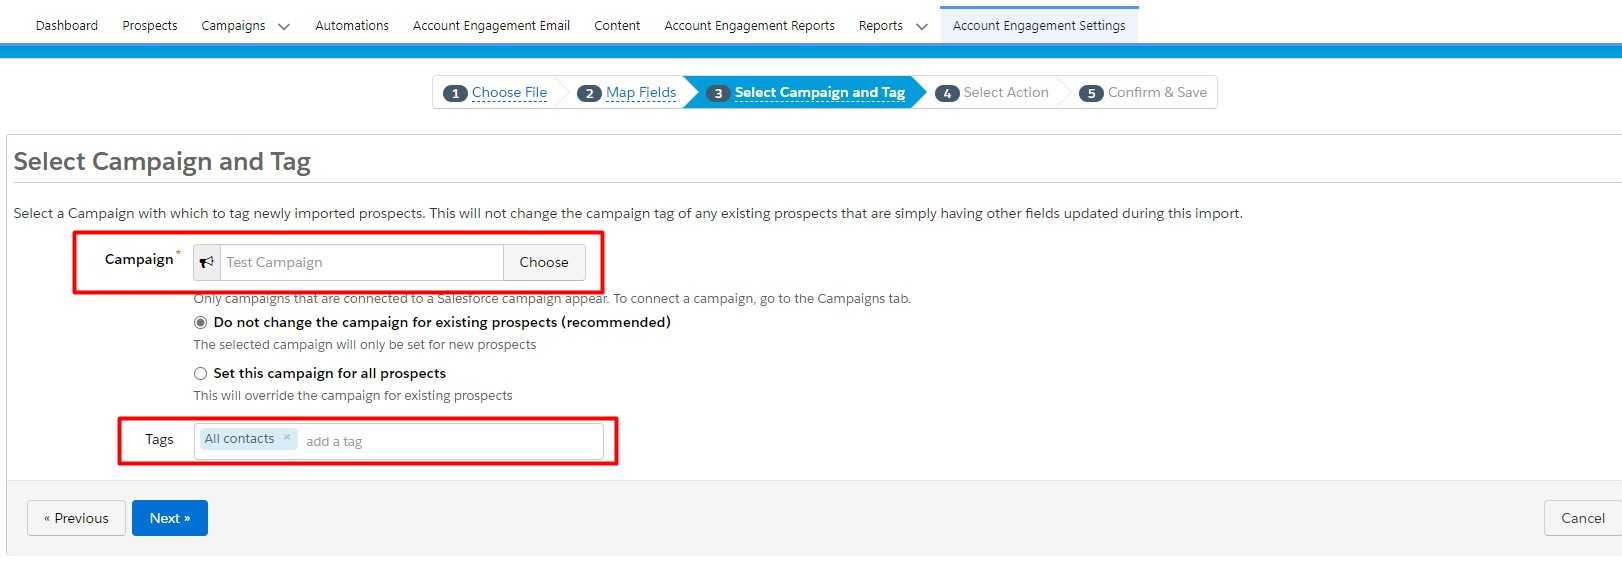
- Choose a Campaign: Assign prospects to a campaign.
- Add Tags (optional): Tag your prospects for easy identification.
- Make Sure “Import prospects and add to the list(s)” is Selected: This ensures your data goes to the right lists.
- Choose Lists: Select existing lists or create a new one.
- Provide a name and select a folder for the new list.
- Save the list.
- Review and Confirm: Check for duplicates and ensure your settings are correct.
- Click Confirm & Save: Save your changes and complete the upload.
That’s it! You’ve successfully uploaded a CSV in Pardot to manage your prospect data.
